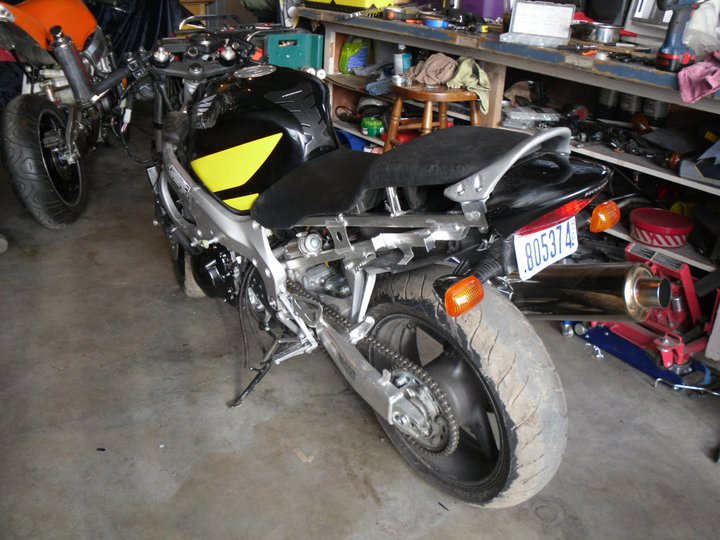
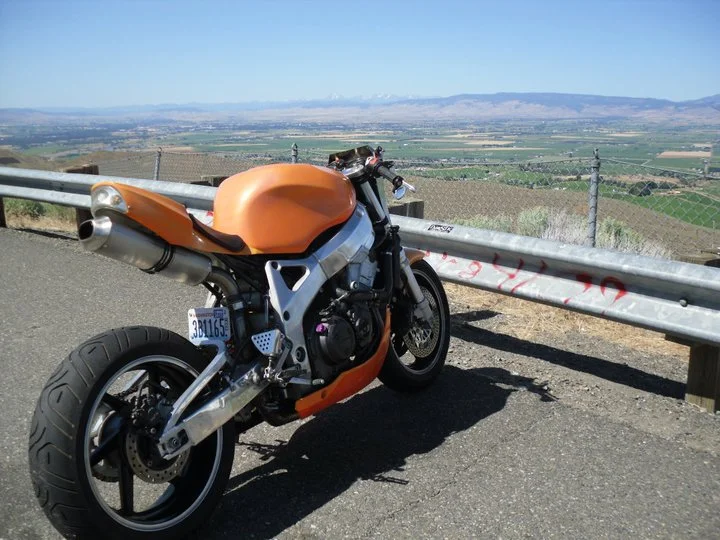
This F4i was liberated in 2011 from a fellow that lowsided on a cold spring day in Ellensburg.
It first needed some new forks so it would ride straight and a headlight shroud to conceal the gigantic plastic abomination of a headlight. Still in my early years of OA welding, I tried my hand at making a stainless headlight shroud by beating it into shape by hand and welding bits together. It turned out looking like a gladiator helmet of sorts. The bulbous tail plastic was scrapped for a sleeker 600RR tail fairing, which took a liberal trimming of the rear subframe to prevent it from sticking out the back of the plastic. The tail was then nestled back into the plastic cowl. The stock exhaust can was cut entirely into a slash-cut can and welded back up again before polishing.
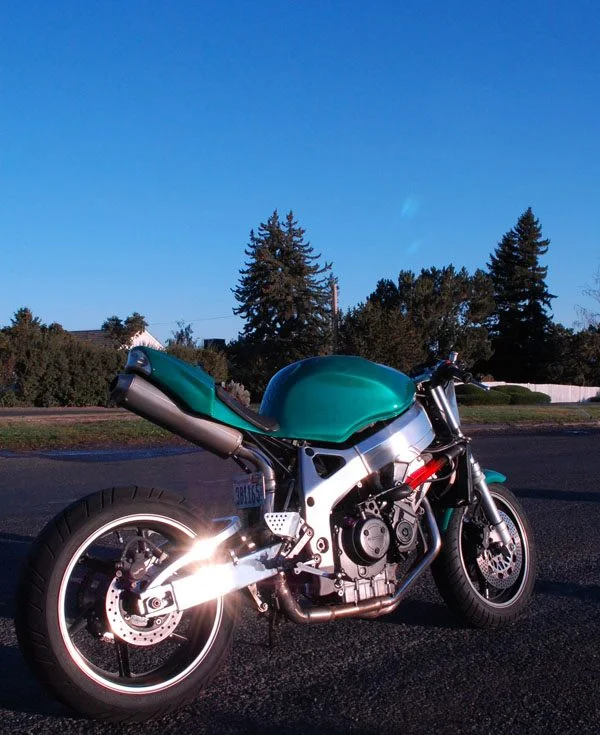
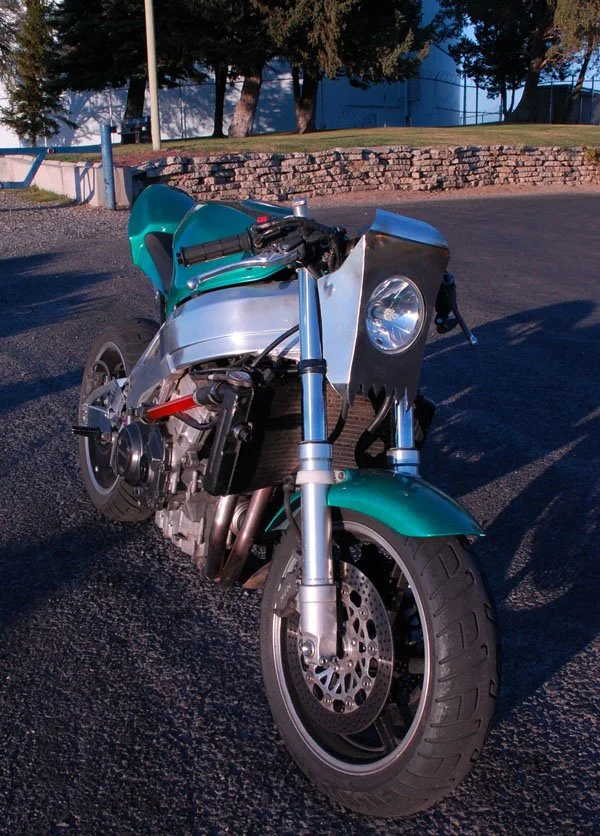
For the second phase of the build, the gladiator helmet was binned for a retro-style rectangular headlight from a Chevy truck. I always did have a thing for the 80's and this look brought me back to the days of the Ascot and Sabre. A custom 4-way adjustable mounting system was welded up using threaded rod to house the automotive headlight and a sheetmetal shroud was welded around it to bring some dualsport looks to the table. A shade of flat OD green was chosen for the paint, although the satin clear turned out way to glossy and diminished the effect of the concept.
It sold in 2012.
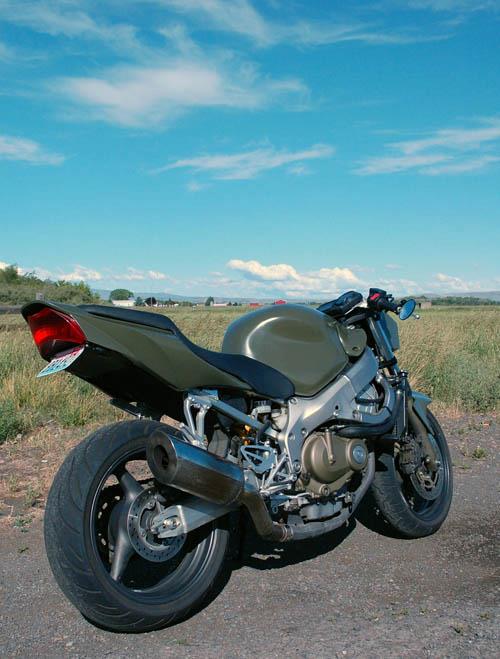
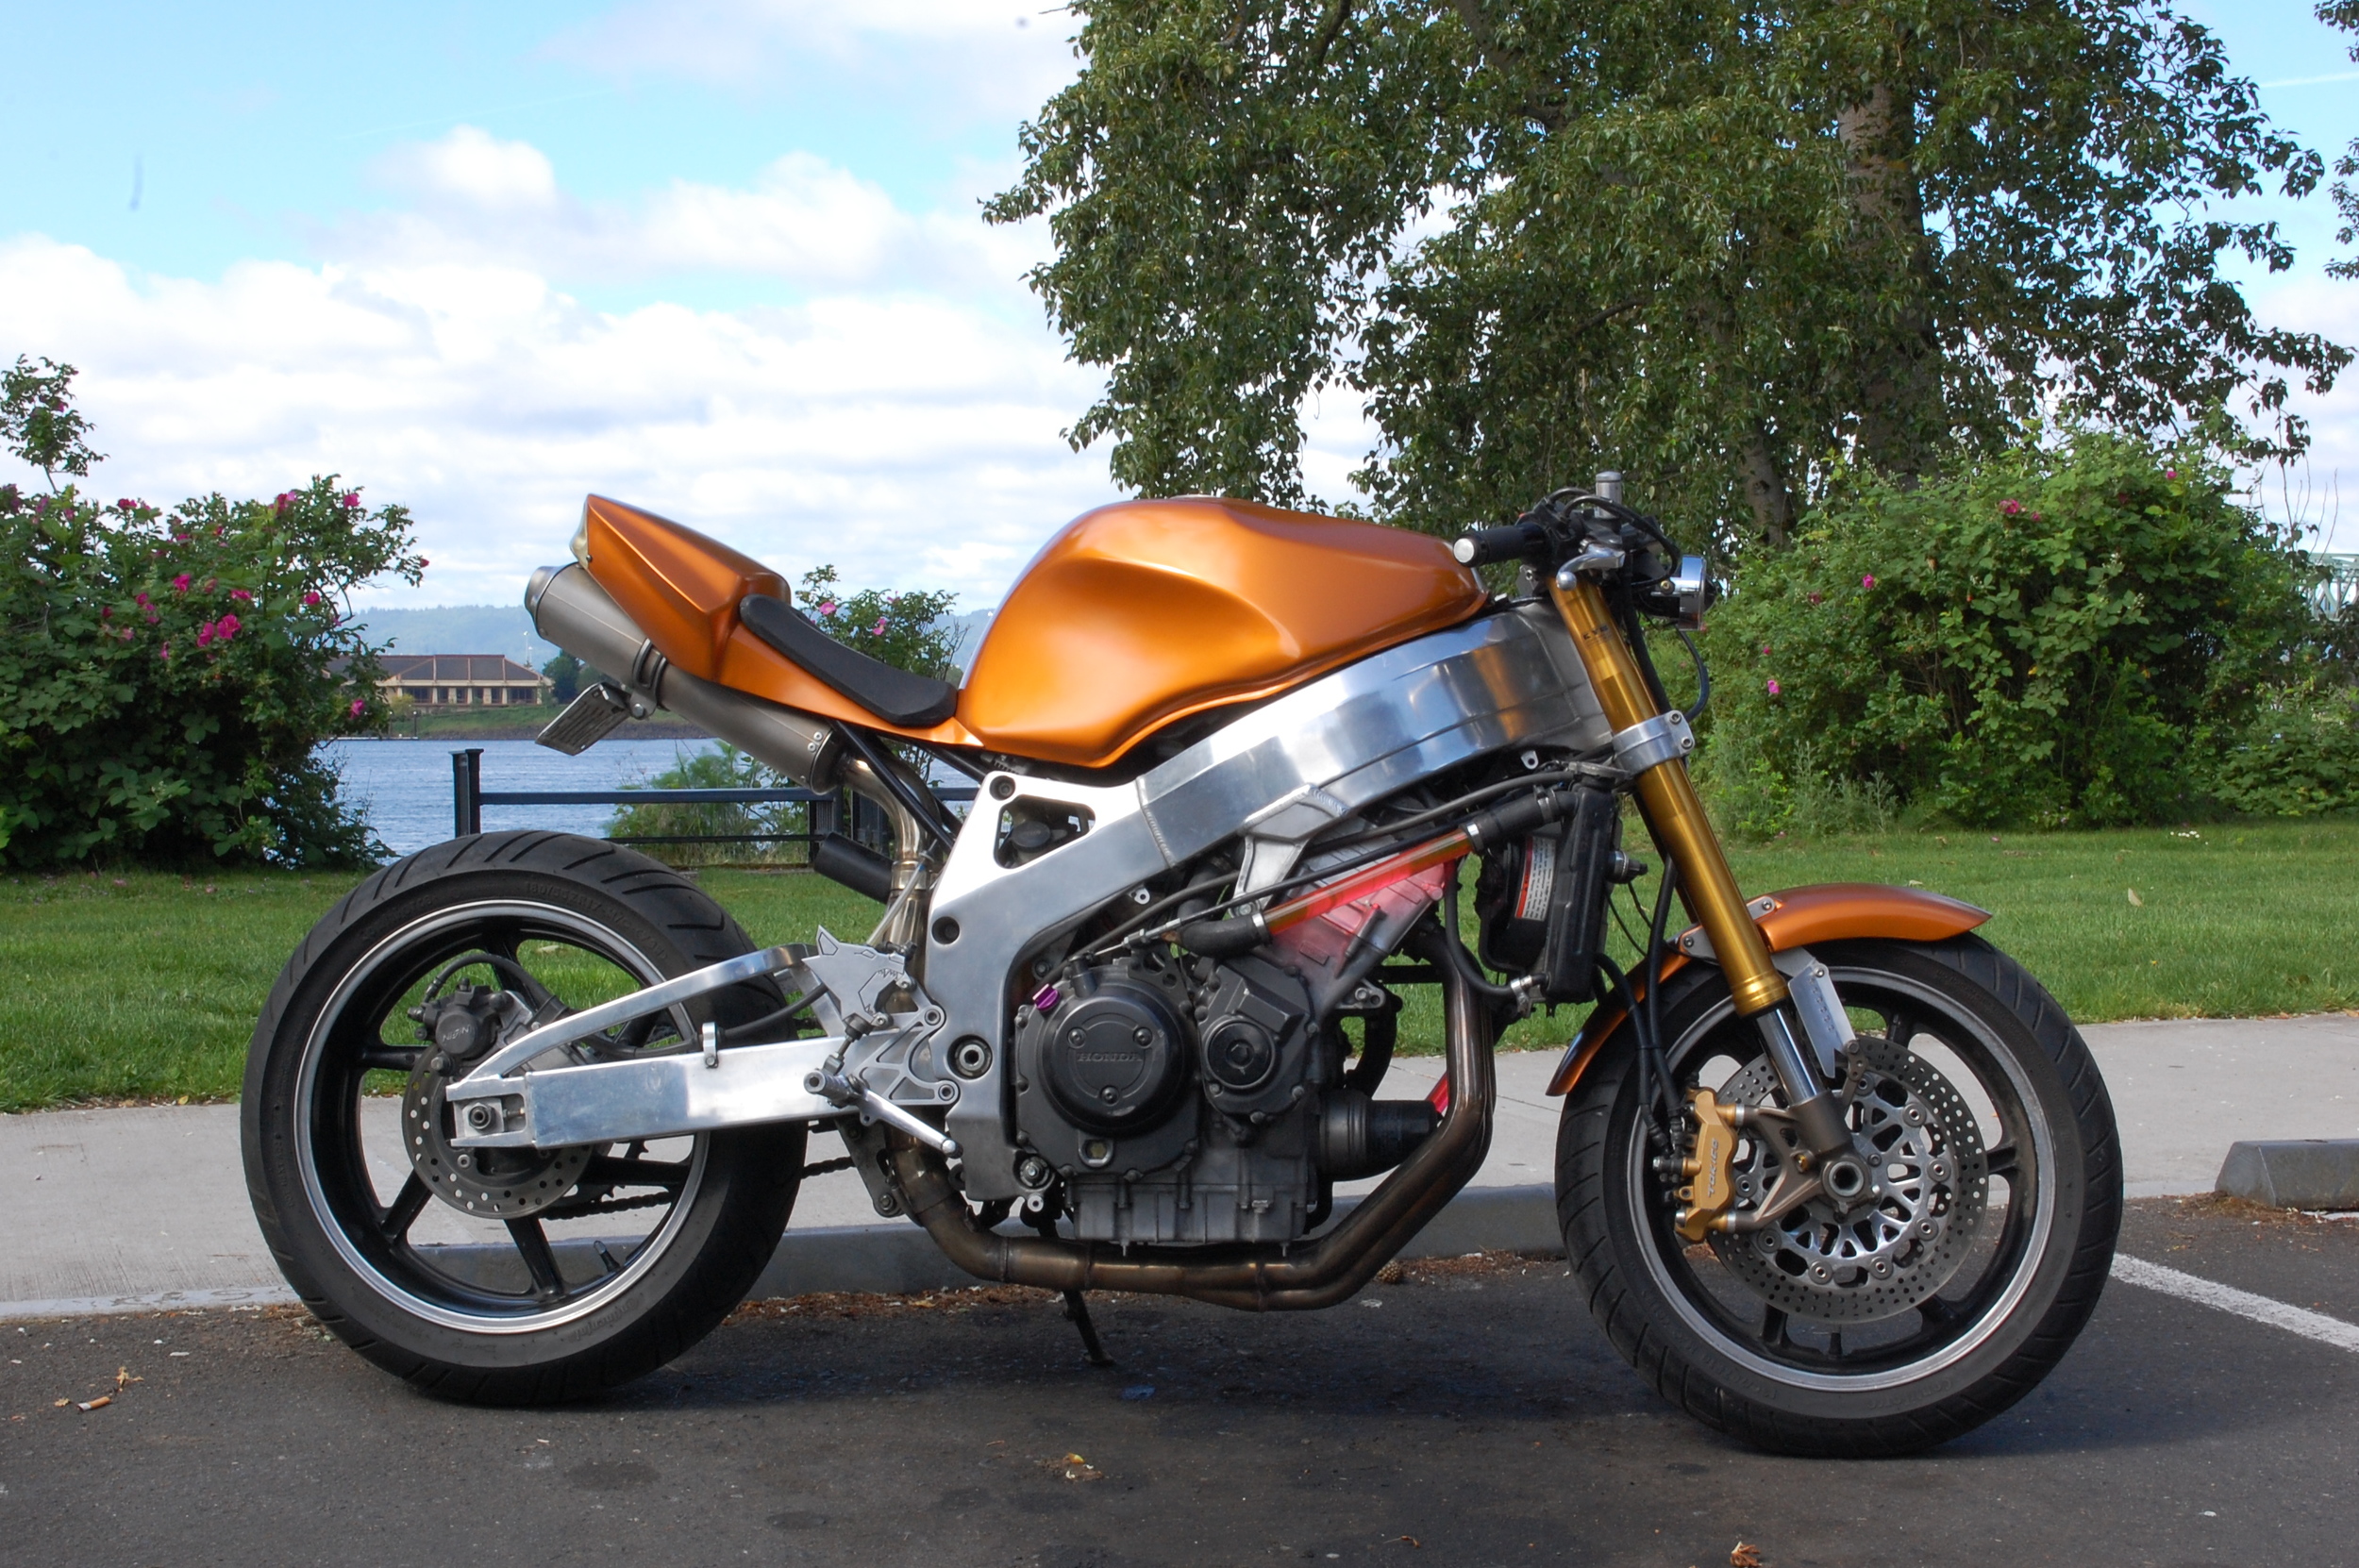
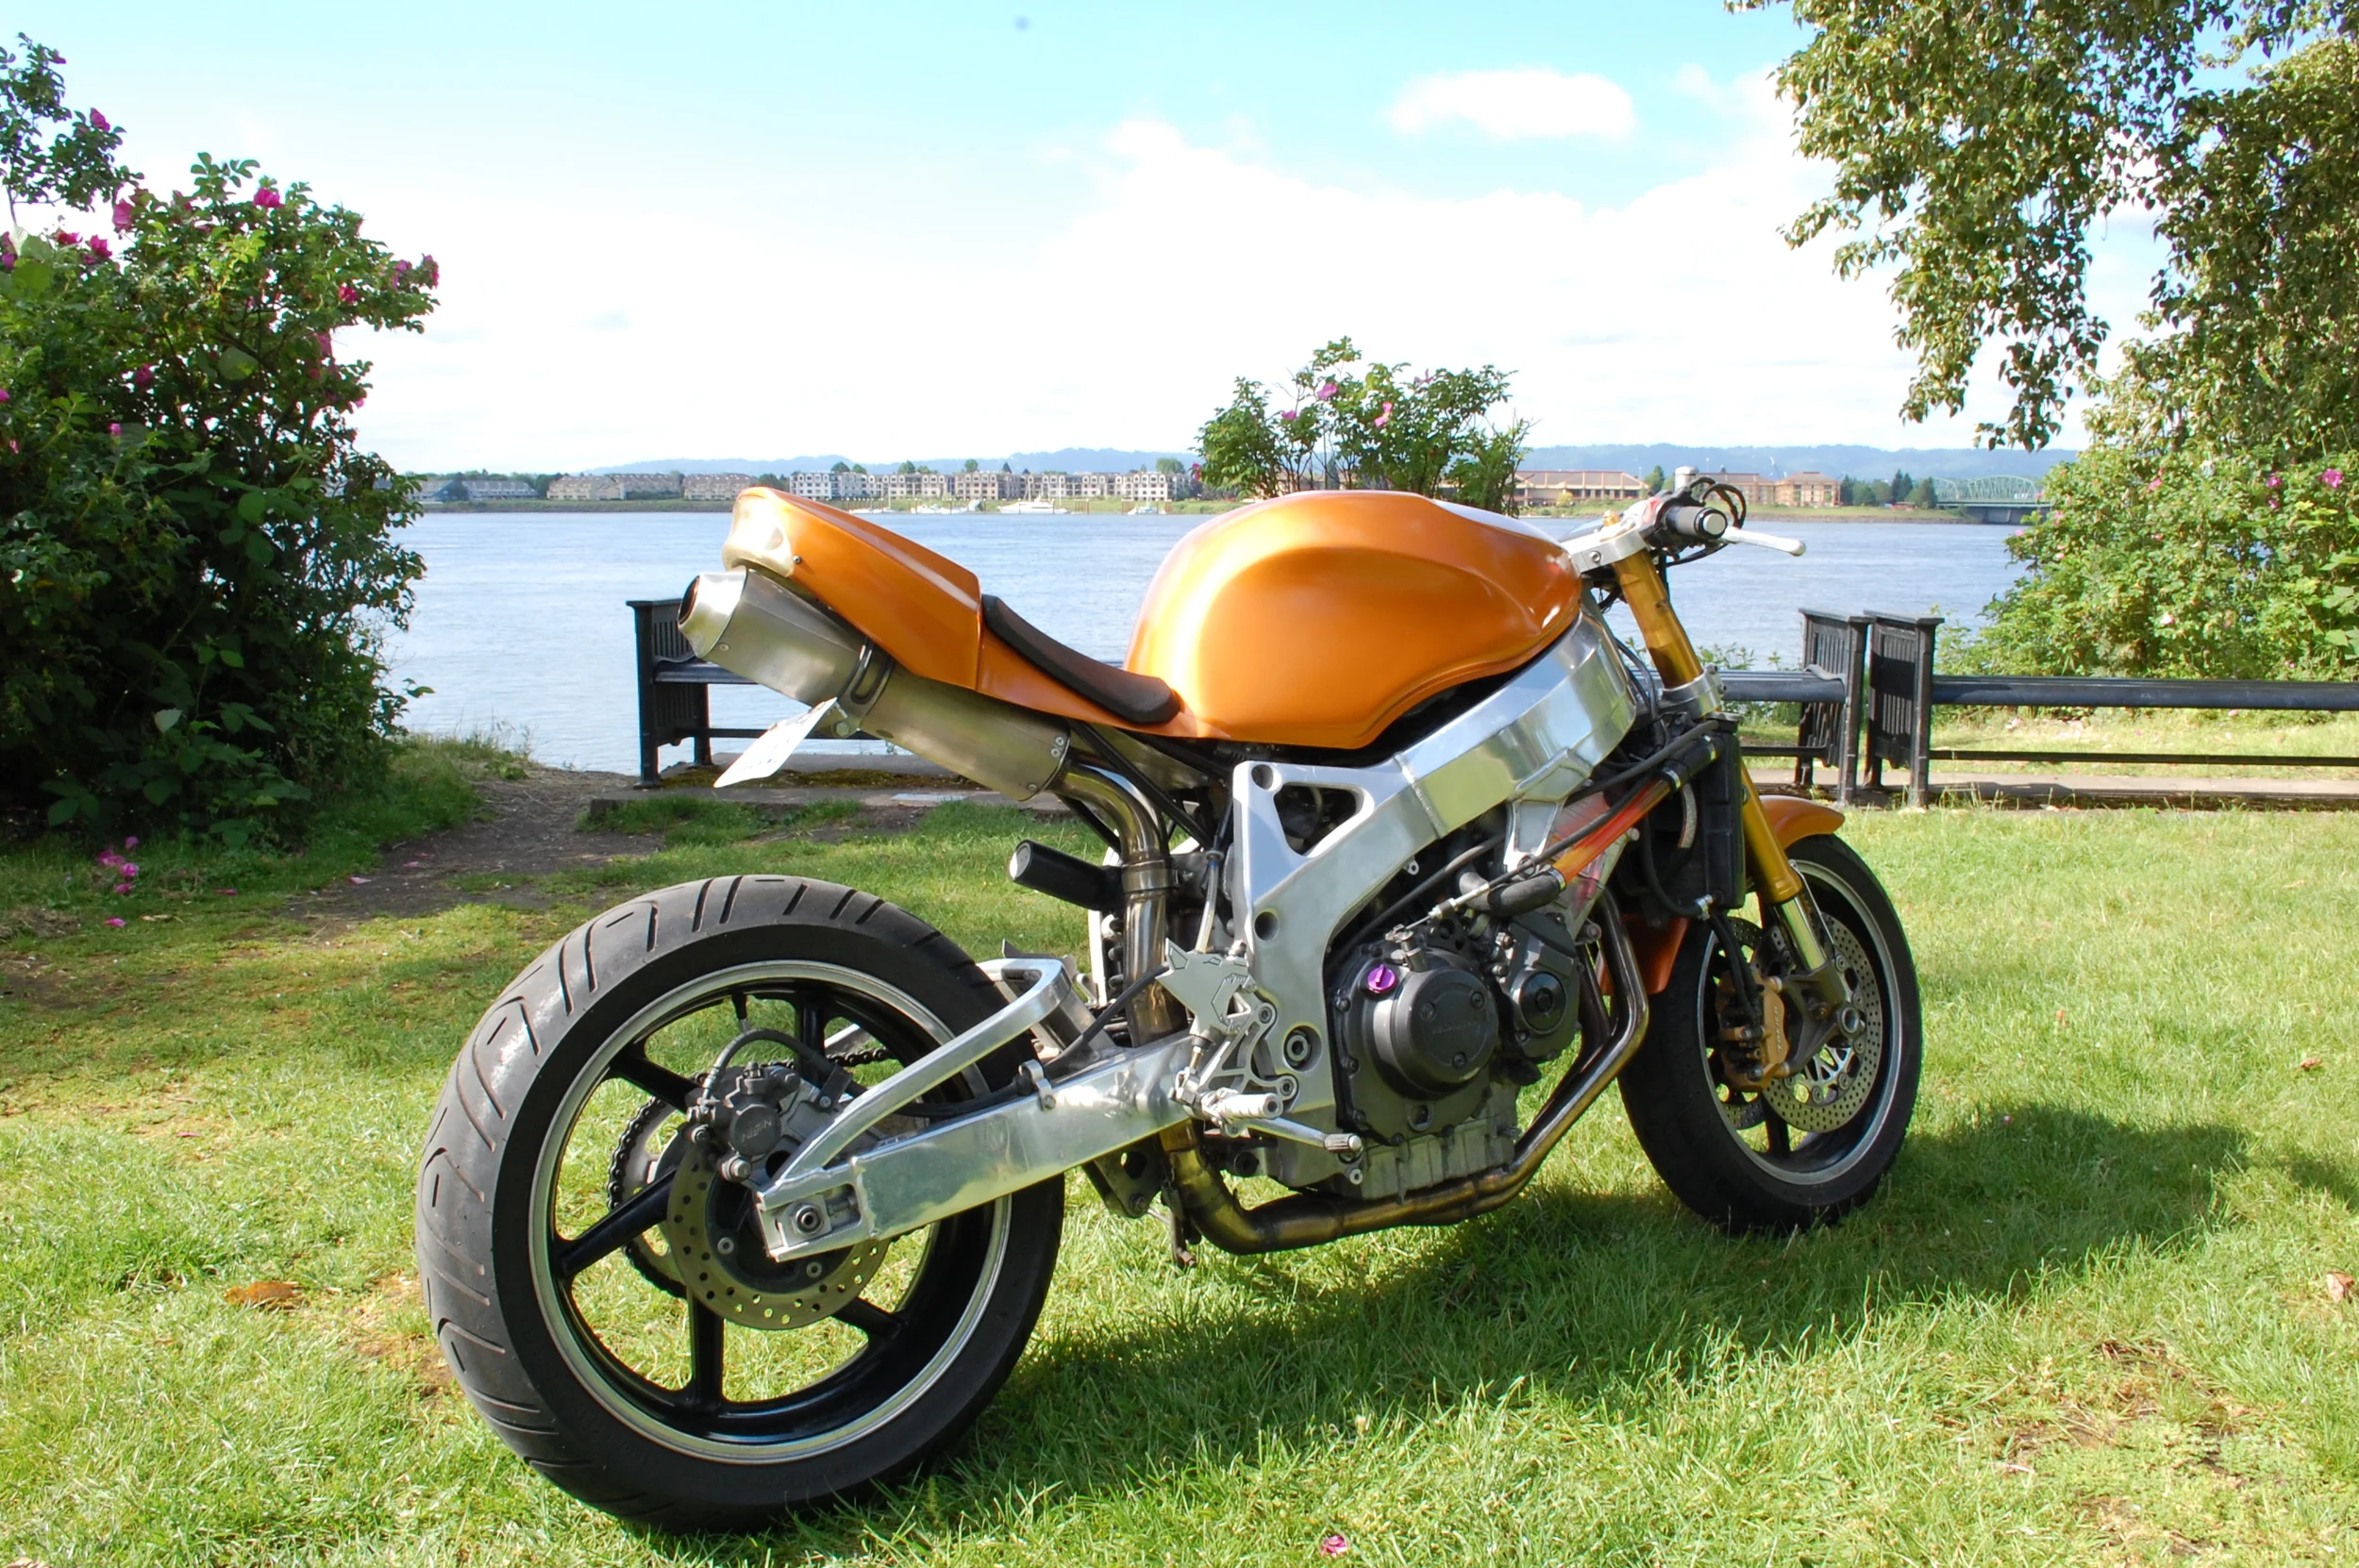
This classic Slingshot was picked up from a fellow forum member of CustomFighters.com in June of 2013 and intended to be a quick build for a customer who was always begging me to sell them one of my streetfighters.
It needed a place for the rider to sit, so I set about my subframe options. The common route is to weld lugs to the back of the frame, but with no TIG welder at that time, I decided to develop a fully bolt-on subframe solution. I started by designing lugs that would bolt into the back of the frame. These were attached with two bolts each through holes drilled into the frame and secured with flange nuts. The lugs and its attachment points were fully engineered to exceed the tensile and shear strength of the stock subframe rail. The rest of the subframe was CNC machined from billet 6061 aluminum and bolts together with stainless steel hardware to completely eliminate the need for AC TIG welding. The bottom subframe spar loops forward over the frame crossmember and bolts into the rear motor mount points.
With the subframe sorted, the gas tank got some bodywork and a nice coat of metallic orange paint. A Trailtech gauge was fitted to the fat dirt bars. A unique headlight bracket setup holds the twin rectangular headlights to the top triple clamp to eliminate clutter on the fork tubes and a one-off sheet aluminum shroud keeps them covered up and looking like a transformer. A broken set of integrated tail lights donated their LED arrays to a CNC machined aluminum tail light housing.
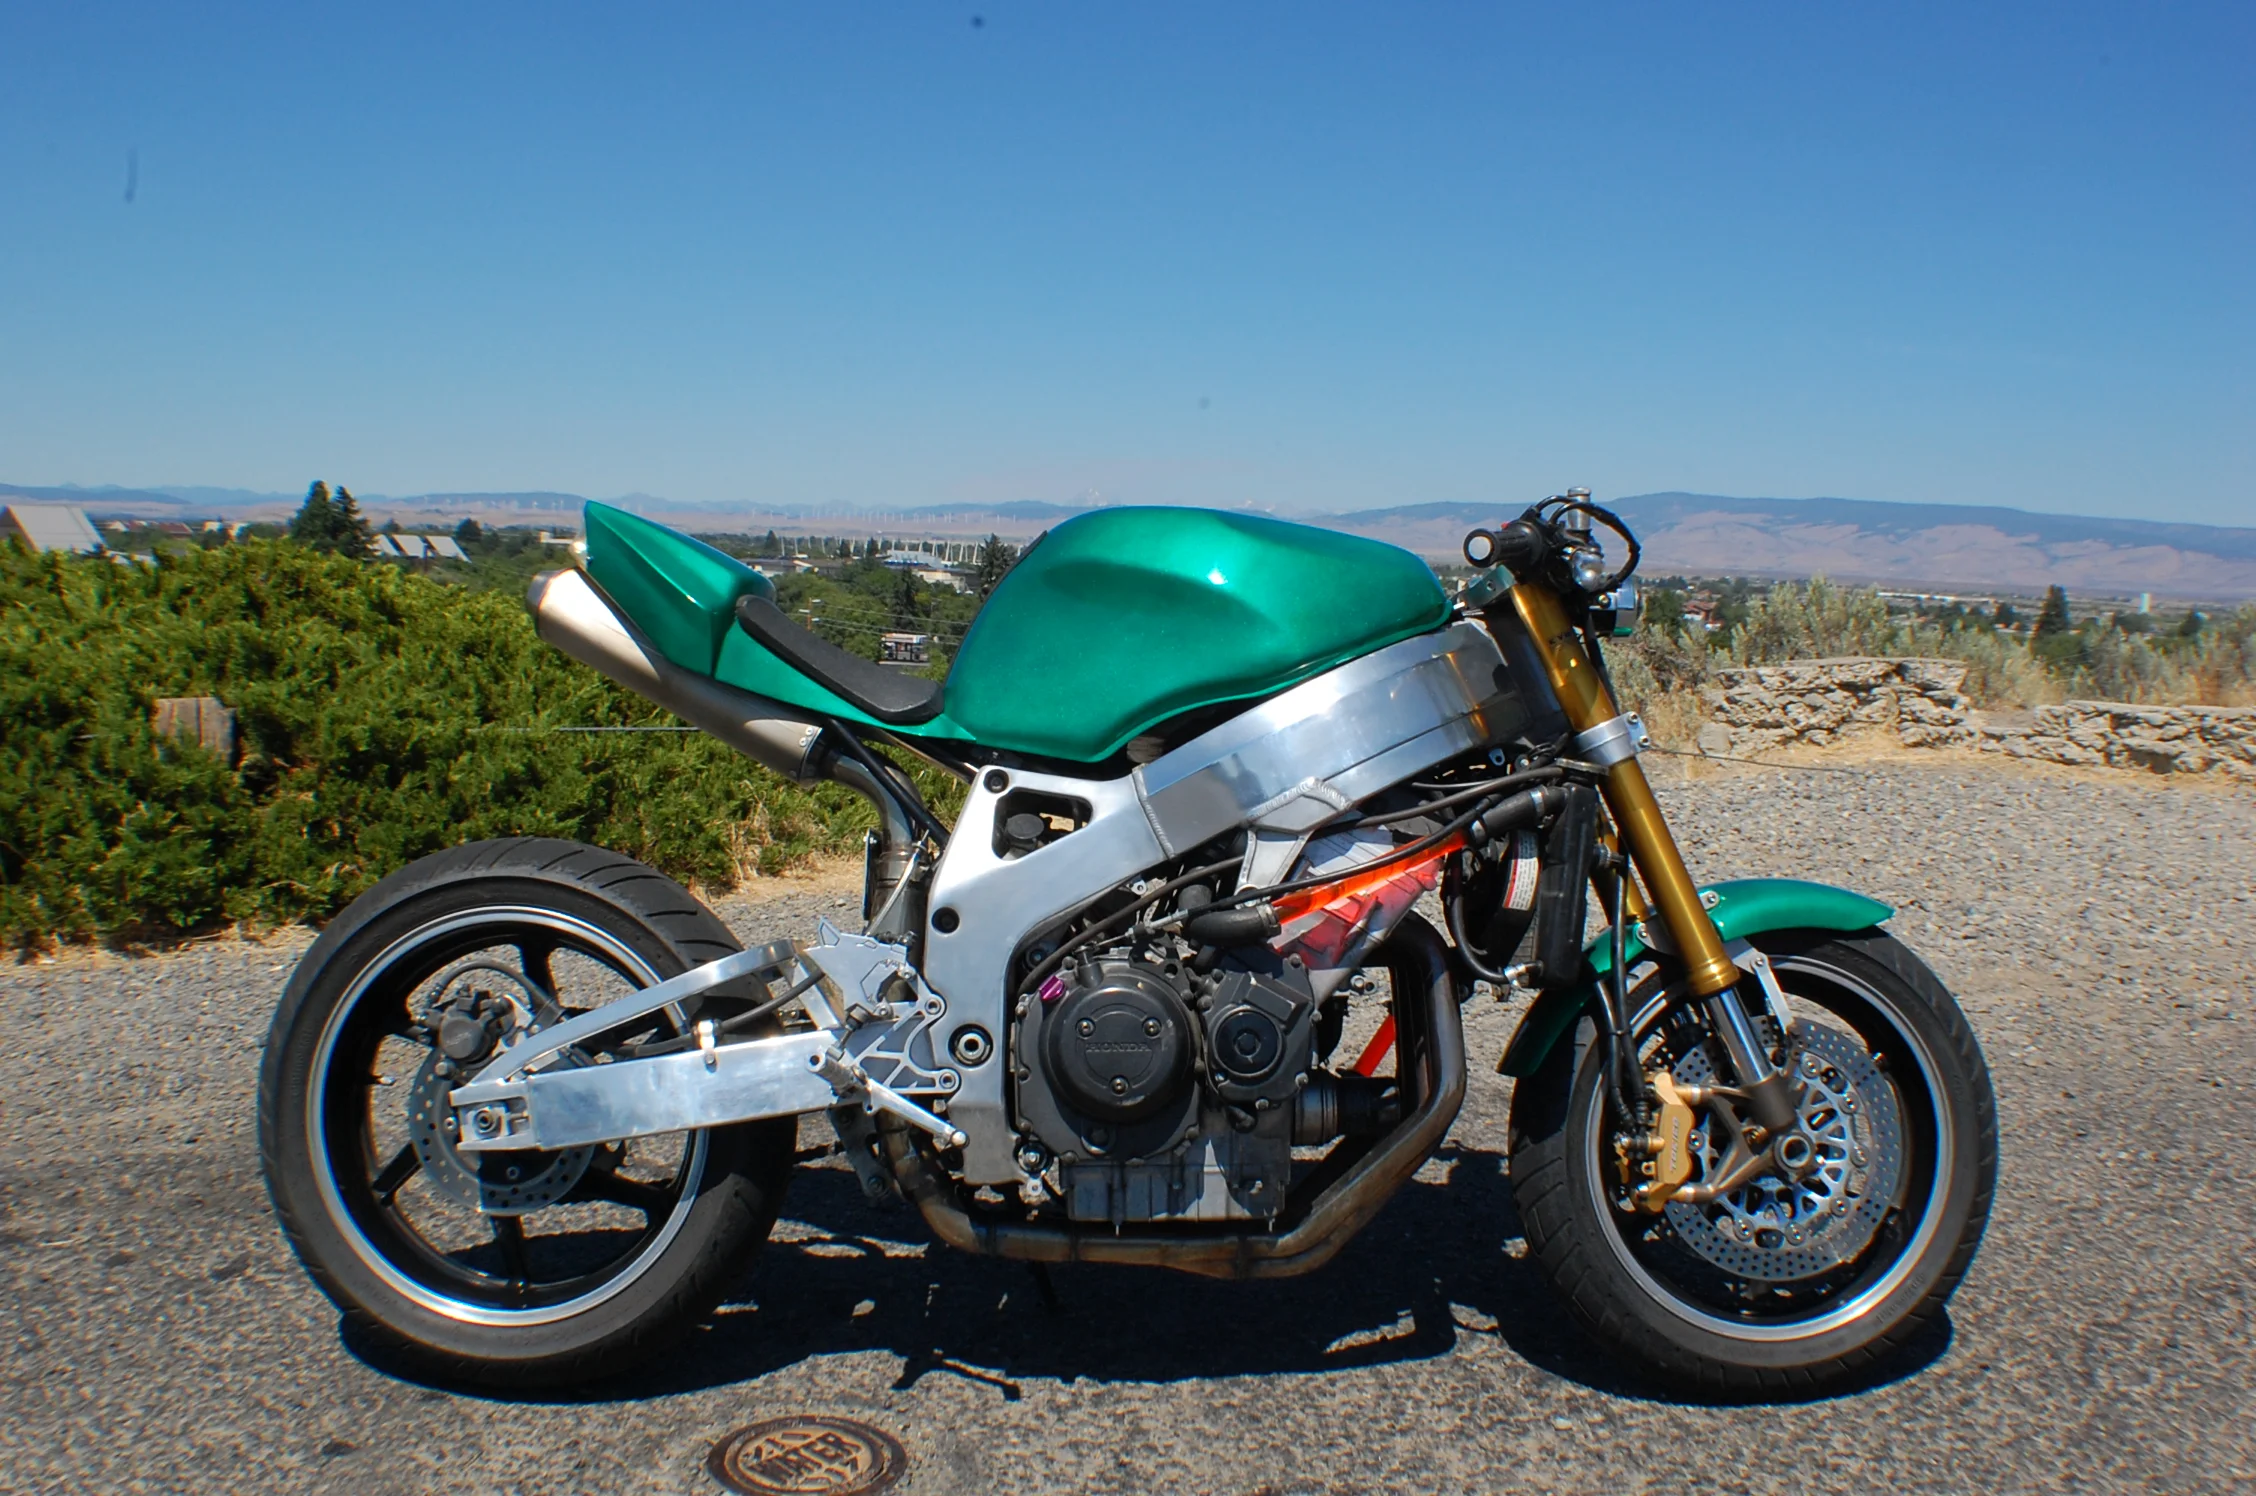
This is the quintessential Dogmeat Enigma bike.
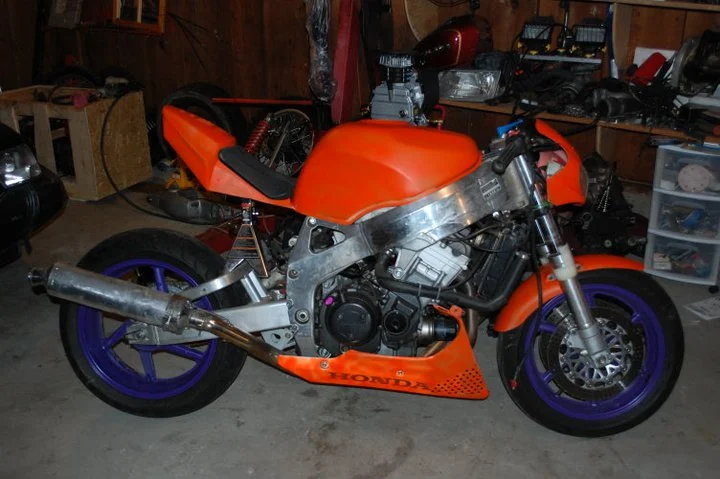
It came to me in 2010 as a 1996 900RR (Fireblade as they call it across the pond) that was used and abused on the track. The previous owned raced it and binned it on the track quite a few times, resulting in some damage to both sides. Then he started to take some parts from it for use on his other 900RR, notably the subframe.
My first task was to decide on a tail. I wanted the tiny-tailed german streetfighter look, but without the $500 german tail price. Taking some inspiration from a thread on Customfighters.com, I set out looking for pocket bike tail plastics. The replacement plastics I found online still went for a couple hundred, so I set my eye to craigslist again. I found a whole "not running" pocket bike for the same price as the replacement tail, so I grabbed it, stripped it of all the bodywork and lights, and sold the chassis back to someone else on craigslist. I ended up with a tail that complimented the lines of the tank and gave me the proportions I was looking for. Not to mention, it came with the added bonus of a bolt-in tail light with integral turn signals.
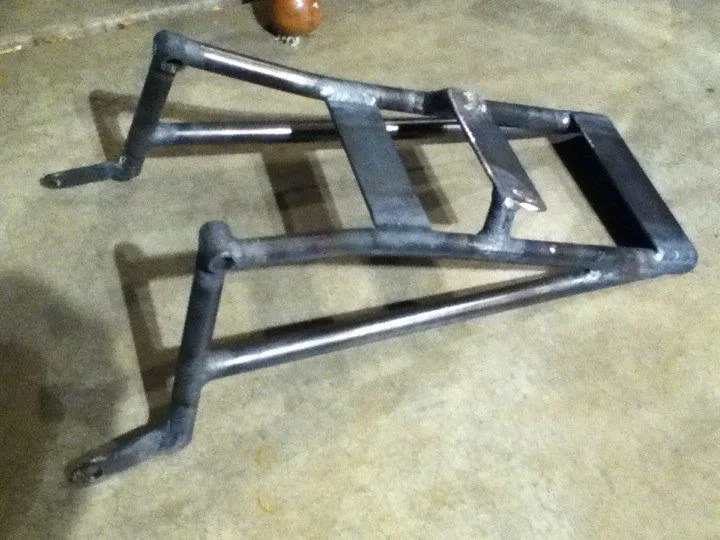
The next order of business was to figure out a subframe so I could sit on it. The subframe of the pocketbike was a meager single loop designed for 80 lb kids, not 180 lb dudes. I decided not to use any part of it. I opted to design and build my own to ensure that my genitals would stay safely and permanently suspended over the rear tire and chain. As I was still stuck with the oxy-acetylene welding rig back in those days, I did not feel confident in welding structural aluminum, so I built the structural parts from mild steel and the sub-subframe from aluminum.
Once I had a structurally sound bike, I set up a temporary exhaust and got it running. I made up a custom belly pan by chopping and plastic welding the stock fairings. The tail, once mounted to the subframe, was trimmed and plastic welded to flow into the lines of the gas tank. The gas tank needed a lot of bodywork, including filling in the bottom seam to make it flow better with the tail. I settled on a paint scheme of rattle can Ace Hardware fluorescent marking paint with a layer of Autozone metal flake clear over it. It looked great while it lasted. Many little modifications were made to the radiator, the gauges, and the wheels to get the desired look. I also came up with a crazy idea for a headlight shroud while traveling for Army duty. I made a little sketch on a cocktail napkin at the airport and needed to try it out on this bike. The first attempt was not the best because the stainless steel that I got for free was some knife-grade alloy and would not hold a bend whatsoever. I tried to make it work by welding multiple sheets together, but it still ended up rather boxy looking. Oh well!
I always knew I wanted an undertail exhaust, so I made one using the stainless downpipe from a CBR600RR by hacking and welding until it went up through the swingarm and terminated under the subframe. After a few failed attempts at making my own can from sheetmetal, I found a set of stock Ducati 1098 cans on craigslist for less than the price of scrap and pounced. One of those cans nestled perfectly underneath the stainless undertray I made for the pocket bike tail, so I went with it. While taking my machining class, I made a billet brake fluid reservoir, manual cam chain tensioner, bar end mirrors, and some bar brackets.
The fluorescent paint started to fade in the sun, so I hit it with some metallic green. I remade the beastbot shroud properly with some bendable stainless and it turned out faithful to the drawing. Drawing on inspiration from a bike seen in Streetfighters mag (as always), I made up some clear radiator tubes from Pyrex so you can see the blood flowing through it's veins. I also swapped the radiator for a Ninja item because the custom 900RR rad exploded due to the failure of the cooling fan.
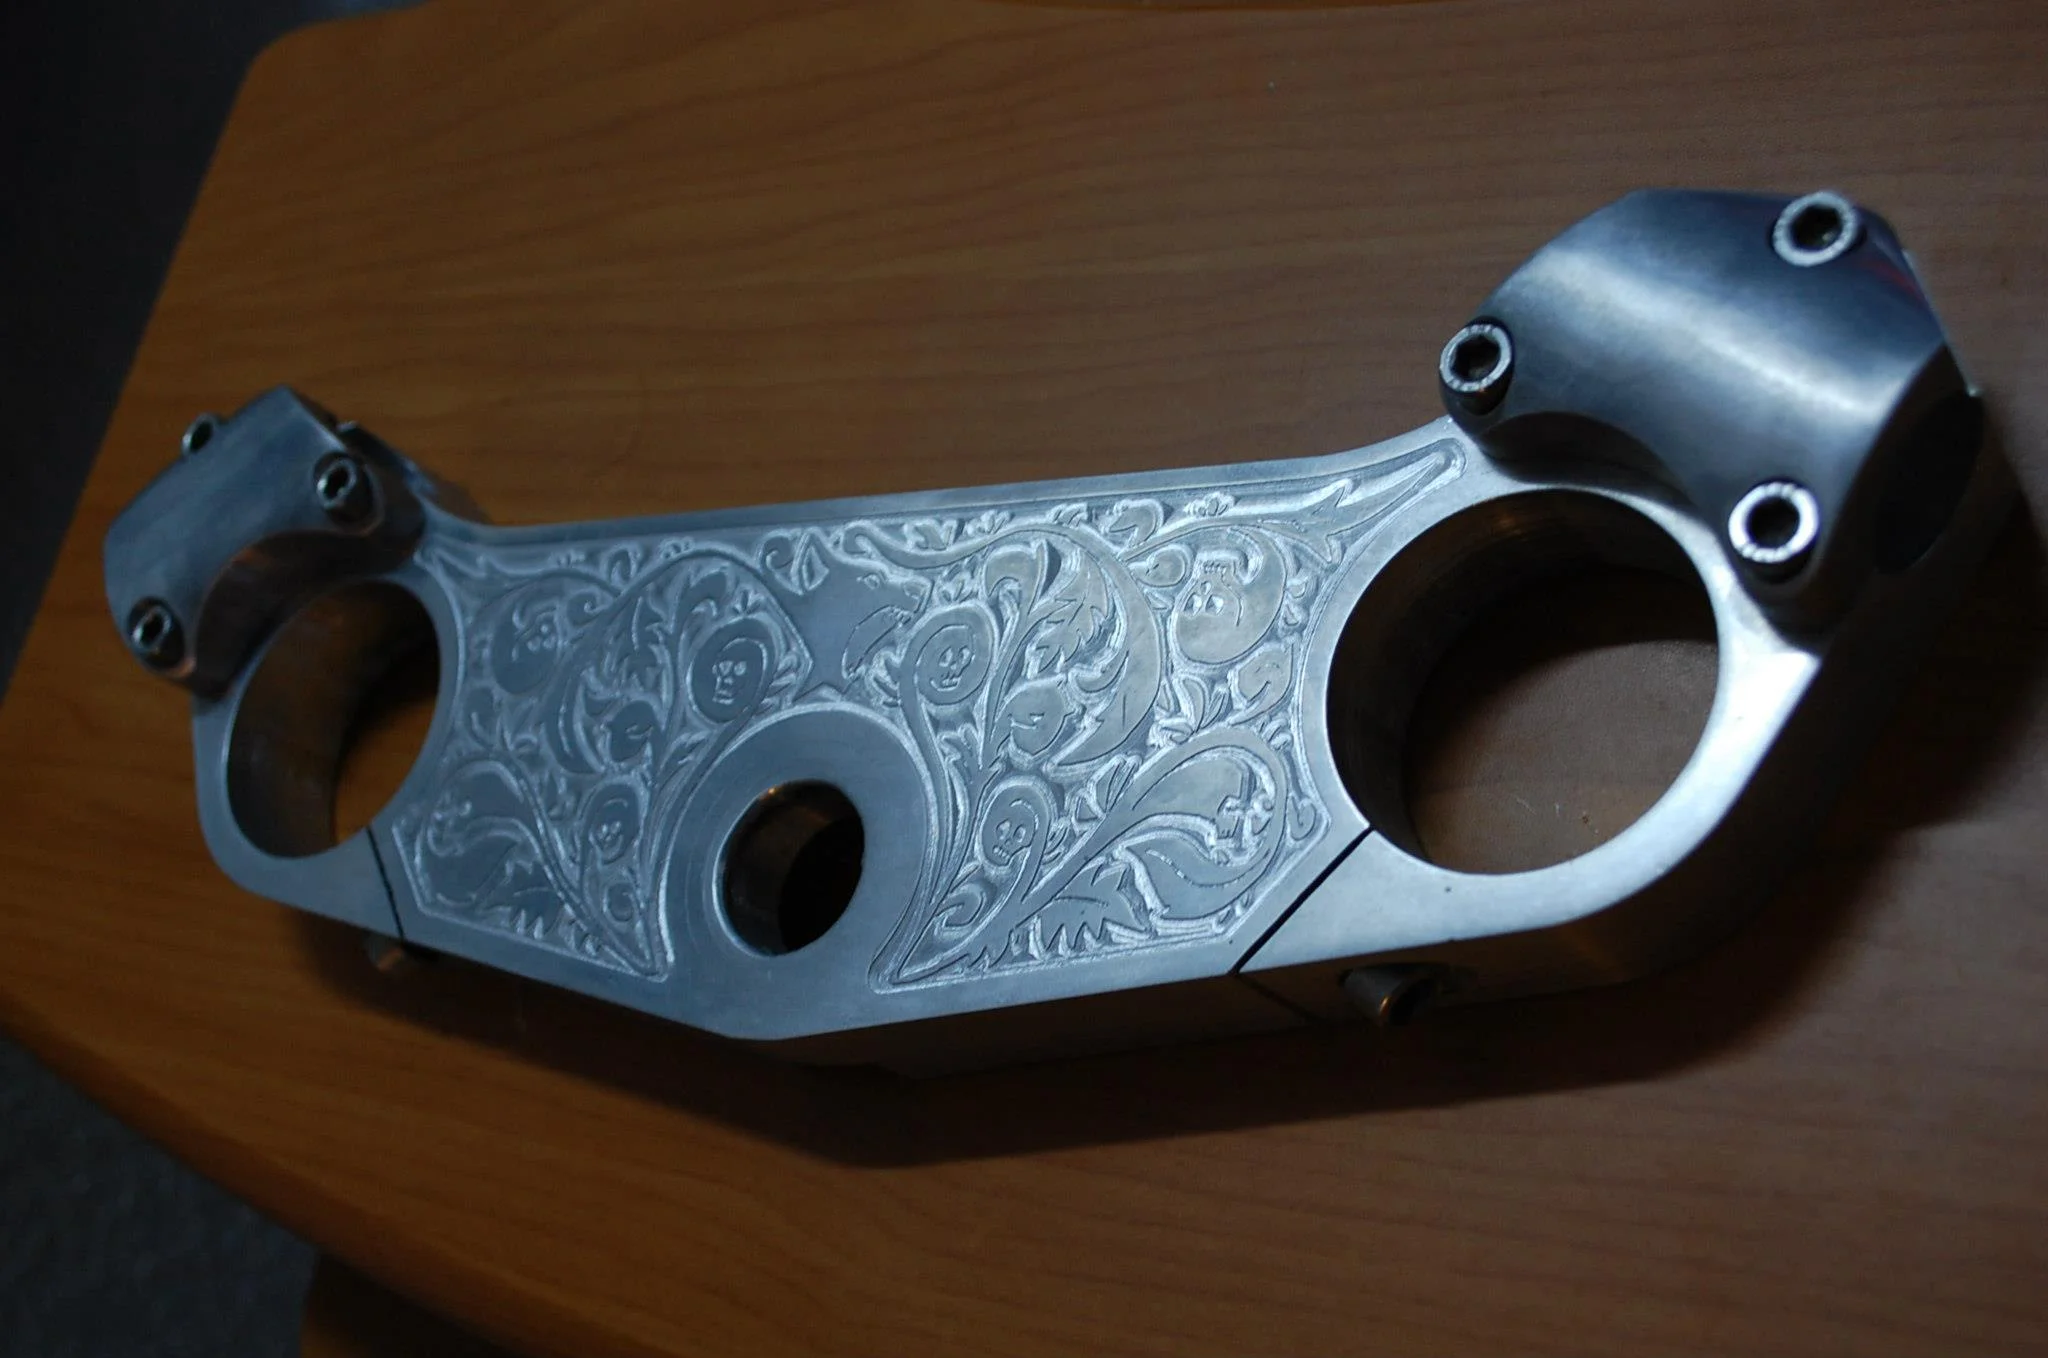
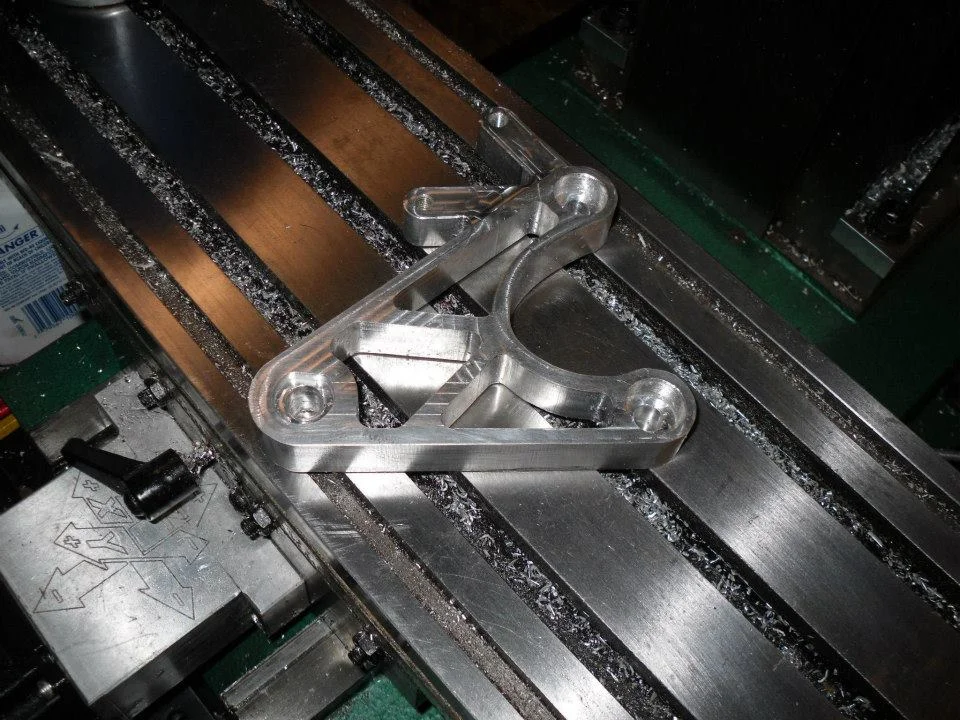
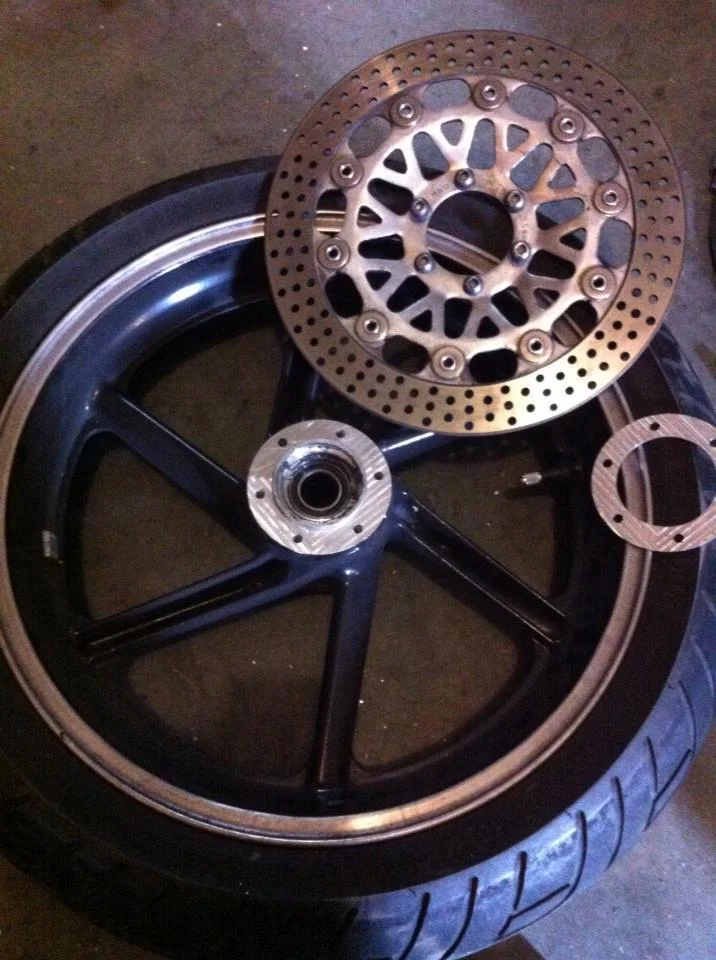
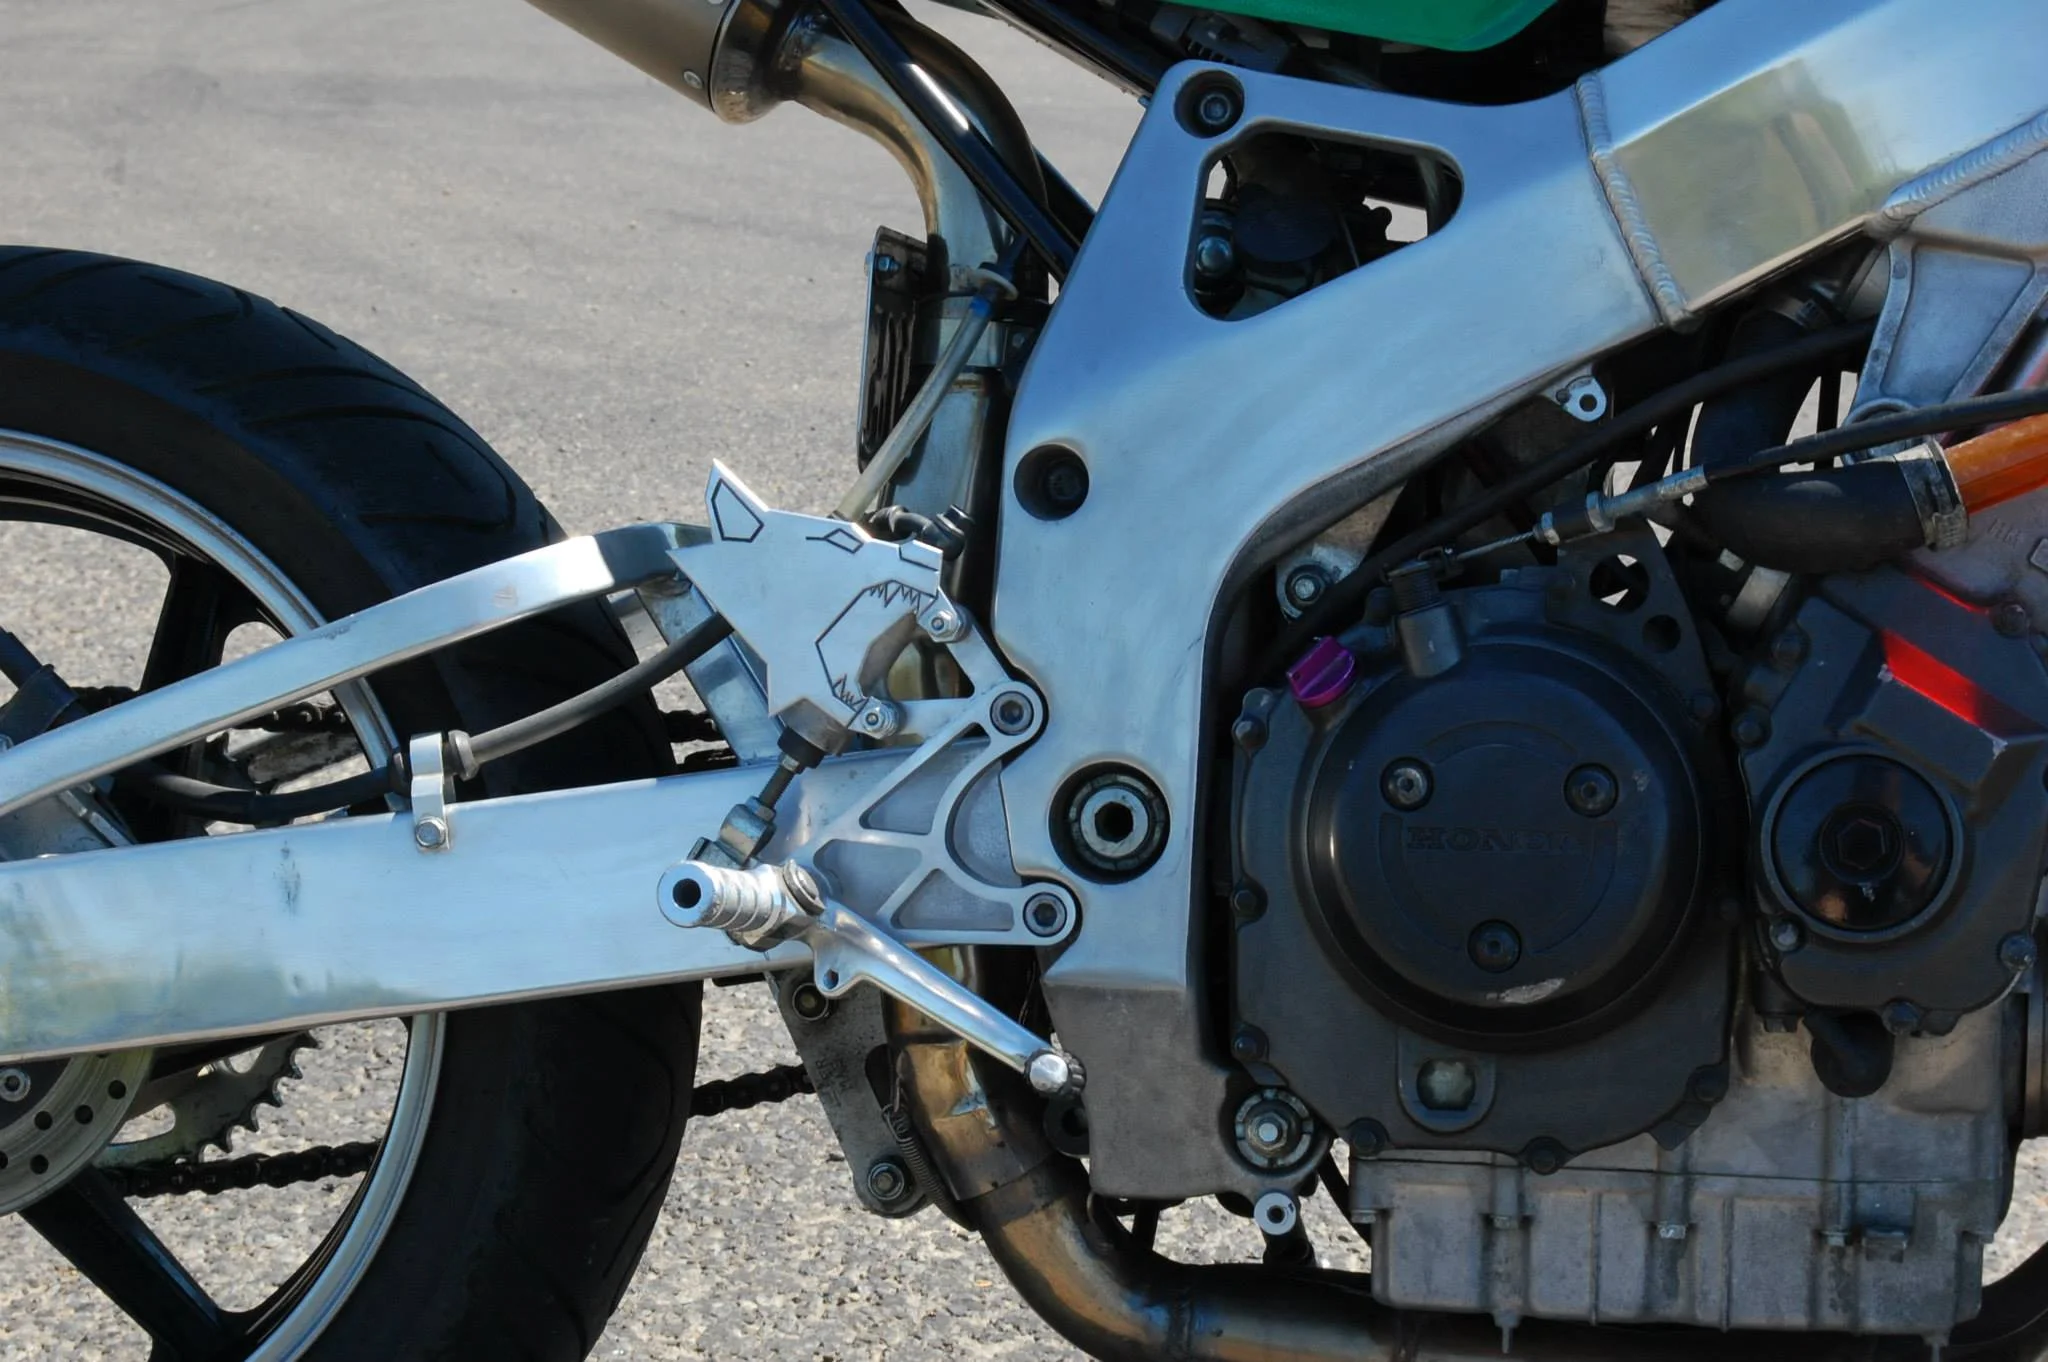
Once I got the CNC Mill running, it was time to start the blingification. To complete the Ninja 636 fork swap, I designed and machined a top triple clamp with integral bar clamps, a mild steel steering stem bushing, a wheel bearing sleeve, brake rotor spacers, brake caliper spacers, axle spacers, and fender adapter brackets. I designed and machined one-off rearsets and heel plates sporting the logo of the Enigma. While watching Antiques Roadshow, I was inspired by the old Colt pistol factory engraving and designed some filigree to engrave on the top face of the triple clamp. It seemed fitting to put my dog head logo in it, reminiscent of the Colt wolf head logo engraved into their handguns. I drew the design on paper and scanned it into the computer. The CNC engraving took two hours.
The inverted 636 forks and radial calipers greatly improved the handling of the bike and bring the suspension into the current millenium. The gauge cluster came from a single batch of gauges imported from China. The Triumph round headlight had to be donated back to the Speed Triple when it was sold off, so in place of it went a halo projector unit.
Eventually, the green paint showed to be very fragile and took a beating. It was ultimately repainted with a durable and chemical resistant metallic orange. The failed old remote reservoir shock was binned and replaced with a nifty black 08 CBR1000RR shock. Fork stanchion covers were made from aluminum sheet and now house the LED turn signals.
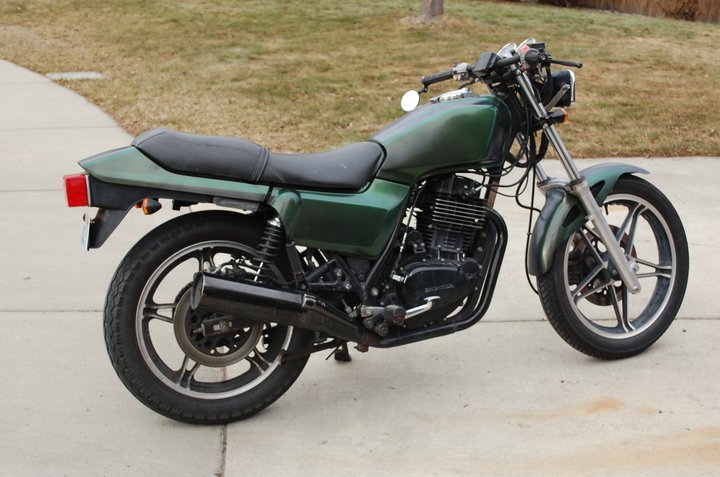
This bike came into my possession in 2010 after I found it on Craigslist in Ellensburg for a fantastic price. It barely made the short ride home, sending the air filter an other miscellaneous parts tumbling down the road for the entire trip. The guy that I bought it from alleged to be a brain surgeon, but took very poor care of this old Ascot.
The first thing I did was track down a replacement body panel and spray it down with some chameleon green paint. It turned out looking quite good from six feet away. The headlight was also far too high for my taste, so I welded up some new brackets from stainless steel that lowered it to a reasonable height. I also pilfered the clocks from my SP500 parts bike to replace the completely non-functioning and disgusting Ascot unit.
The next order of business was tackling the handlebars. I tried some straight bars that were so uncomfortable, they lasted for less than a week. I eventually opted to weld up my own clubman style bars from mild steel salvaged from a scrapped shopping cart. Those turned out to be nice and solid! All it needed next was a bar-end mirror and some decent LED turn signals and it was ready to roll.
Riding the old thumper was a blast in the summer time. It got great gas mileage and was fun to take out into the dirt every once in a while. I thought it would be decent in the snow, but one attempt to ride it to class in the snow revealed the on-off switch nature of the throttle to be rather hazardous in the low-traction environment. It had only two engine speeds: stall or wheelspin. At least the low seat height made it easy to keep both legs down and keep the bike upright while sliding down every street.
It sold later in 2010 to a kid in Yakima who promptly tore it apart in an attempted head gasket swap and listed in on Craigslist one year later as a basket case.